Builder - Output Folder

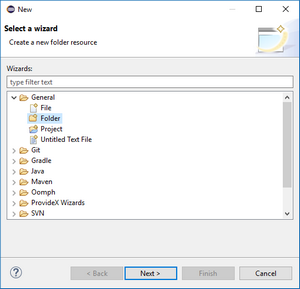
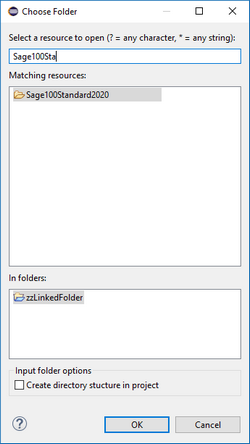
Eclipse includes the ability to create a "Linked Folder" which is a simple pointer to a folder outside of the current Eclipse workspace. This can be used to create a link to an application folder or to a special work folder.

Once the "Linked Folder" is created, it can be associated to the output folder of one or more projects. The builder will then copy any file updated in the output folder to each linked folder maintaining the same sub-folder structure as the project.

While there are other methods of linking folders within Eclipse, the steps outlined below illustrate the preferred approach.

The steps below use a dummy project in the current workspace as a container where the linked folders are created.

Warning Eclipse is case sensitive - be consistent with the names that are used for any files created in Eclipse projects.

Create Project

If you do not already have a dummy project in the current workspace, the following steps describe how to create one.

  1. Select the menu item New > Project... to start the wizard.
  2. Expand the General category and select Project and press [Next] to create a generic project for the linked folders

    New project wizard

  3. Enter a unique name, such as zzLinkdedFolder, that will be easy to identify.
  4. Press [Finish] to complete the creation of the project.

Create a Linked Folder

STOP 
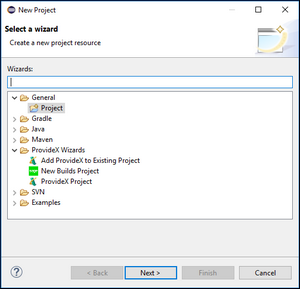
Once the linked folder has been created, it cannot be changed to reference a different application folder. A new linked folder must be created for each application folder to be referenced.
  1. Right click on the dummy project and choose New > Other... from the pop-up menu.
  2. Now choose the General > Folder wizard and press [Next >].

    New project wizard

  3. Enter a unique name for the folder that is derived from the application and version to make it easy to identify later, such as Sage100Standard2020.
  4. Press [Advanced>>] and select "Link to alternate location (Linked Folder)"

    New project wizard

  5. Press [Browse...] and select the application folder to be linked to the Eclipse project.
    Warning 
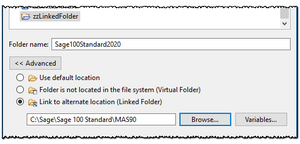
Be careful when selecting an application folder - the folder structure of the Eclipse project will be recreated in the selected application folder.
  6. Press [Finish] to complete the creation of the linked folder.

Link Project to Folder

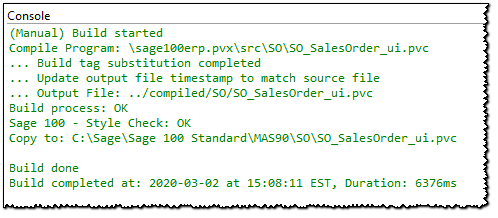
Now that the "linked folder" has been created, it must be associated with the project that has the application programs/files that need to be copied during the build process.

  1. Expand the Eclipse project to be associated with the linked folder.
  2. Right-click on the output folder (usually named "compiled") and choose "Properties"
  3. Select the ProvideX properties page from the list

    Output folder properties

  4. Press [Search] enter the name of the linked folder in the filter field - do not press ENTER since the filter begins to work as you type.
  5. Choose the linked folder that was just defined (such as Sage100Standard2020) from the list of matching resources and press [OK]

    Choose test folder


  6. The selected resource will be added to the test platforms. Repeat the previous step for each application to be associated with this project.
  7. Press [OK] to complete the process.

Building Resources in Project

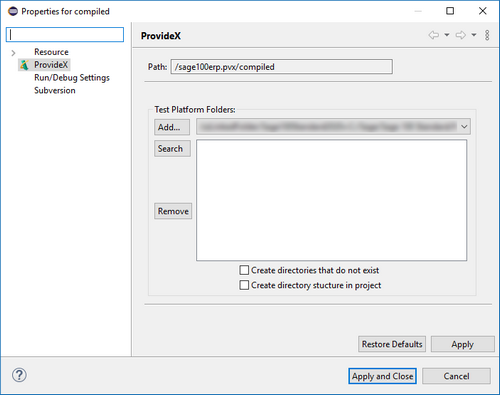
When a resource is (re)built in the project it will be copied to the test folder. The folder structure of the project will be recreated (as necessary) within each test folder that has been associated with the project's output folder.

Builder console output