 |
Eclipse is case sensitive - be consistent with the names used for any files created in Eclipse projects. |
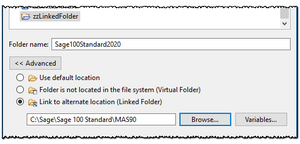
Eclipse includes the ability to create a "Linked Folder" which is a simple pointer to a folder outside of the current Eclipse workspace. This can be used to create a link to an application folder or to a special work folder.
Once the "Linked Folder" is created, the plug-in can search the contents of the folder or copy files into the folder or sub-folders of the folder.
While there are other methods of linking folders within Eclipse, the steps outlined below illustrate the preferred approach.
The steps below use a dummy project in the current workspace as a container where the linked folders are created.
|
Eclipse is case sensitive - be consistent with the names used for any files created in Eclipse projects. |
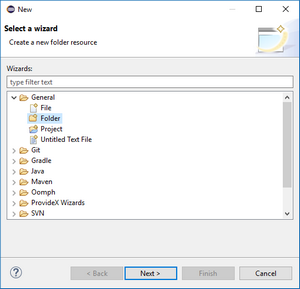
If you do not already have a dummy project in the current workspace, the following steps describe how to create one.
|
Once the linked folder has been created, it cannot be changed to reference a different application folder. A new linked folder must be created for each application folder to be referenced. |
|
Be careful when selecting an application folder - the folder structure of the Eclipse project will be recreated in the selected application folder. |
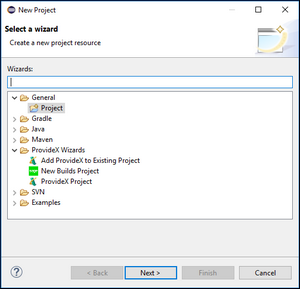
Next Section: ProvideX Project