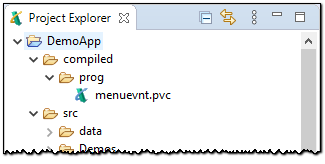
In the Project Explorer view, select the DemoApp project's output directory: DemoApp > compiled.
Right click the compiled folder and from the context menu select Delete. Click OK to confirm. The project now contains the source directory only.
In the Project Explorer view, select DemoApp > src > prog > menuevnt.pvc.pvxsrc.
Double click on menuevnt.pvc.pvxsrc to open the file in the ProvideX Editor
Change the file in some way; e.g., add a comment to the end of the file
! A comment
Save the file by typing Ctrl+S or select the File> Save menu item.
The ProvideX builder will perform an incremental build and only the menuevnt.pvc file will be processed. The project's output directory was deleted in step 1 and 2 above so the ProvideX builder will create the output directory, any subdirectories required, and then the compiled menuevnt.pvc program.
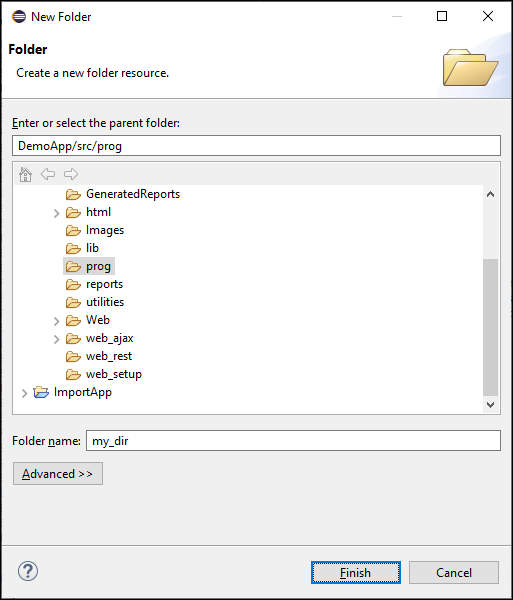
In the Navigator view, select the directory DemoApp/src/prog.
Right click on the prog directory and from the context menu select New > Folder. The New Folder wizard dialogue will appear.
Type "my_dir" in the Folder name field.
Eclipse will create a new folder called "my_dir" in the DemoApp/src/prog directory and the ProvideX builder will create the directory DemoApp/compiled/prog/my_dir.
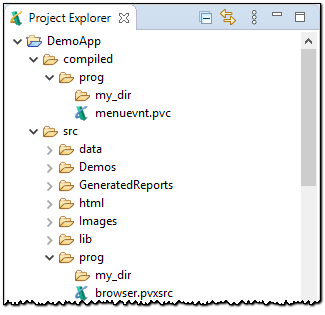
Right click on the DemoApp/src/prog/menuevnt.pvc.pvxsrc file and from the context menu select Move...
The Folder Selection dialogue will appear. Select the DemoApp/compiled/prog/my_dir directory.

Eclipse will move the menuevnt.pvc.pvxsrc source file to the "my_dir" directory and do an incremental build.
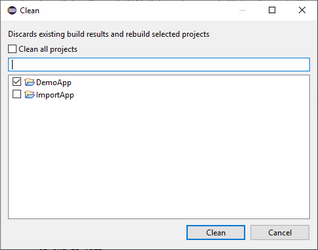
Perform a clean build to make sure the changes we've made to the input directory are reflected in the output directory. Select the menu item Project > Clean... to build the entire project.
The Clean dialogue will appear; click Clean all projects so it is not checked.
Select the DemoApp project and click OK to force every resource in the project to be built.
Now that the project has been built, the output directory will contain every file found in the input directory, and the directory structure will match the input directory. The ASCII text files that contain ProvideX source code have been compiled into ProvideX Tokenized Program files. The project's data files, NOMADS libraries, and any other resources have been examined and then copied to the output directory.