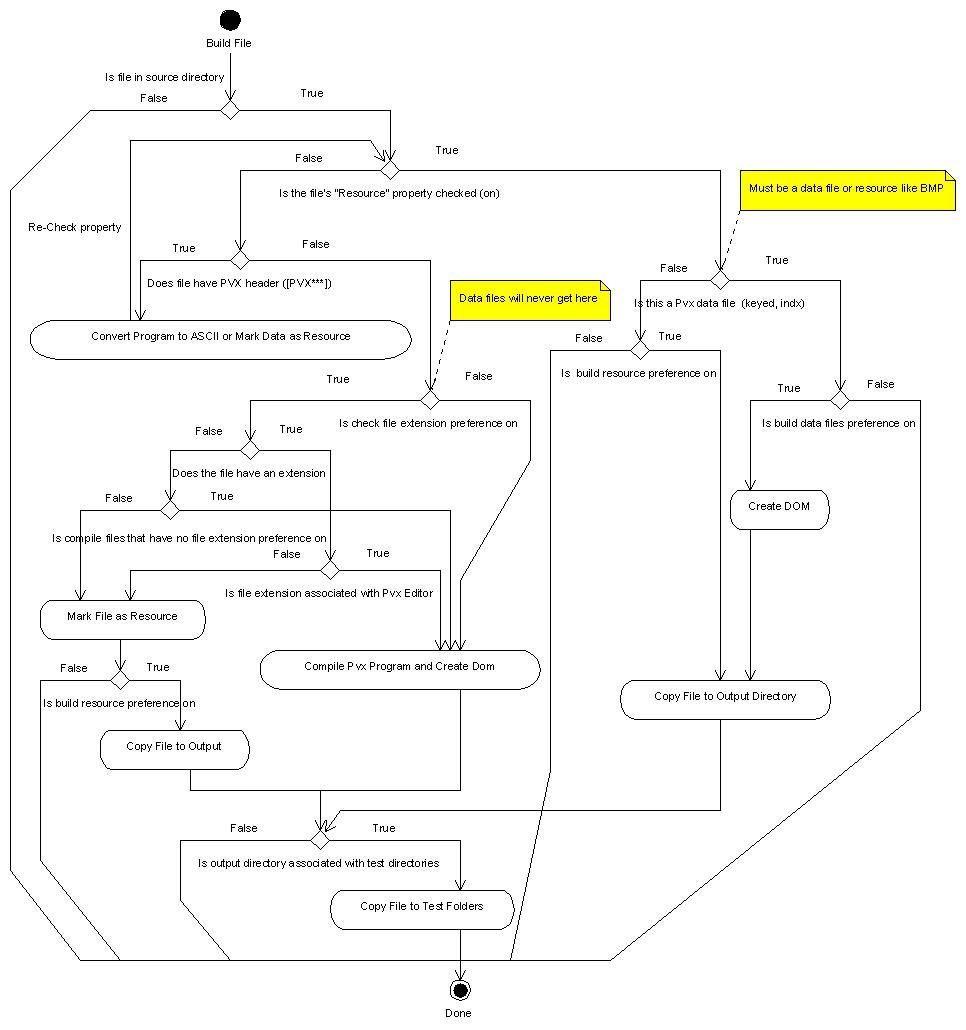
The ProvideX Builder differentiates files containing ProvideX source code that should be compiled from resources like images, HTML pages, data files, etc, that should just be copied to the output directory, by examining the file extension and the "resource" property of each file.
Every file in a ProvideX project's input directory has four properties unique to ProvideX projects:
Resource: Files with the property checked will not be compiled
Password: A password for a ProvideX program file
Owner Code: An Owner Code for a ProvideX program file
Note: The Password and Owner Code properties will be examined in a later section.
If a file's Resource property is checked, then the ProvideX Builder does not attempt to build the file.
Files with the Resource property checked are examined by the ProvideX Builder. If the file is a ProvideX data file, the Builder extracts information regarding the file for the Outline, NOMADS, Properties, and Embedded Dictionary views and then copies it to the output directory.
If the Resource property is not checked, then the ProvideX Builder examines the extension of the file. If the file is associated with the ProvideX Editor then it will be compiled to the output directory. For more information on associating file extensions with the ProvideX Editor see Step #6 of the Preparing the Workbench section.
If the file is not marked as a resource, and it is not associated with the ProvideX Editor (e.g., a *.jpg or *.html file) then the builder will copy the file to the output directory.
In the Project Explorer view, select DemoApp > src > prog > menuevnt.pvc.pvxsrc.
Right click on the menuevnt.pvc.pvxsrc file and from the context menu select Properties.
The Properties for menuevnt.pvc.pvxsrc dialogue will appear. Select the ProvideX properties page from the list.
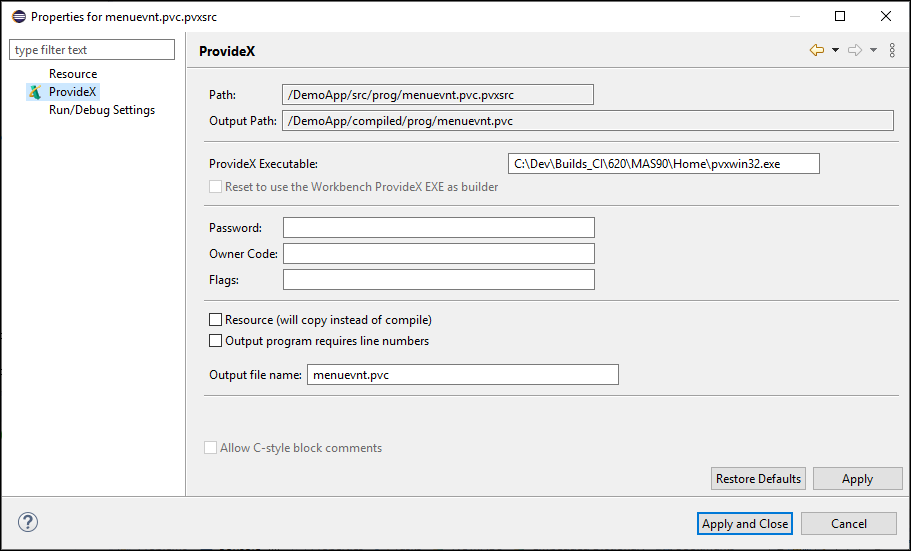
Verify the Resource property is checked and click OK to save.
In the Project Explorer view, double click DemoApp > src > prog > menuevnt.pvc.pvxsrc to open the file in the ProvideX Editor.
In the ProvideX Editor add the following line near the beginning of the ON_CREATE routine:
x = "An Error"
Save the file by typing Ctrl+S or by selecting the menu item File > Save. The ProvideX builder will perform an incremental build and only the menuevnt.pvc.pvxsrc file will be processed.
Examine the Problem view. Notice that the syntax error added to menuevnt.pvc.pvxsrc in Step 6 is not reported in the Problem view.
Examine the Console view. The Console view indicates there were no
errors because the menuevnt.pvc.pvxsrc resource was copied; the
menuevnt.pvc.pvt resource was not compiled.

In the Project Explorer view, double click DemoApp > compiled > prog > menuevnt.pvc to open the file that was copied by the ProvideX builder. The output file is exactly the same as the source file.
In the Project Explorer view, select DemoApp > src > prog > menuevnt.pvc.pvt
Right click on the menuevnt.pvc.pvt file and from the context menu select Properties.
The Properties for menuevnt.pvc.pvt dialogue will appear. Select the ProvideX properties from the list.
Uncheck the Resource property and then click OK to save.
In the Project Explorer view, double-click DemoApp > src > prog > menuevnt.pvc.pvxsrc to open the file in the ProvideX editor.
In the ProvideX Editor, right-click and choose ProvideX Build from the context menu. The builder will perform an incremental build and only the menuevnt.pvc.pvxsrc file will be processed.
Examine the Problem view. Notice the syntax errors for menuevnt.pvc.

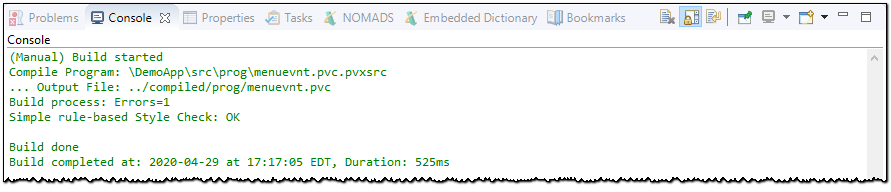
Examine the Console view. The Console view now indicates the menuevnt.pvc program was compiled.
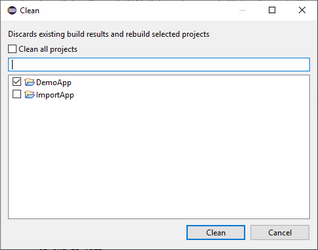
Select the menu item Project > Clean... to build the entire project.
The Clean dialogue will appear; click Clean all projects so it is not checked.
Select the DemoApp project and click OK to force every resource in the project to be built.
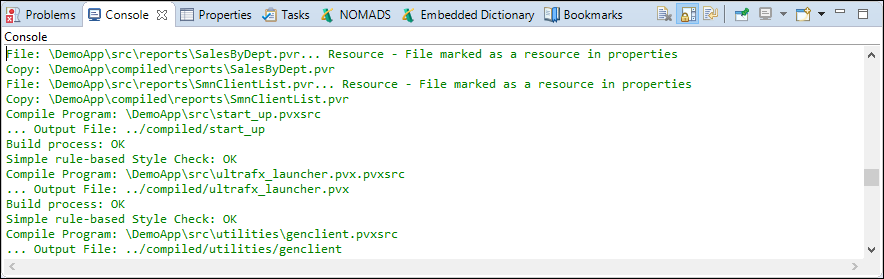
Examine the Console. The Console will indicate for every file in the project, whether the file was compiled or copied to the output directory.
To continue with this tutorial we must return the DemoApp project to its original state; i.e., we must fix the errors we added above to menuevnt.pvc.
In the Navigator view, select and right click on DemoApp > compiled > Prog > menuevnt.pvc.
From the context menu, select Replace With > Local History.
In the Replace from Local History dialog, the history of the program is displayed. Below the history is a Compare pane that shows details of the differences between the selected history and the current state of the file. Select the original version of this file and click the Replace button.