In the Project Explorer view select the DemoApp project or a file in the project.
Confirm the ProvideX Perspective is open.
Click on the button on the toolbar to 'Run ProvideX Console' (look for the ProvideX icon).
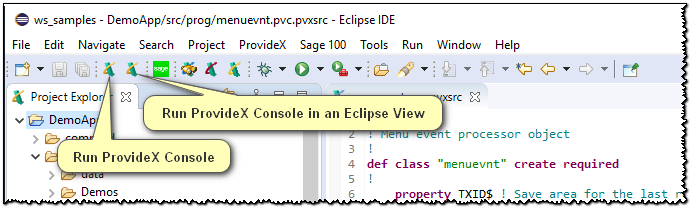
A ProvideX console will appear on top of the Workbench.
Note:
The ProvideX environment has been initialized and the work
directory is set to the 'Output Directory' for the current project. The prefix list
has NOT been set; a global variable %_AltProjectPrefix$ has
been set and includes all of the folders in the current project. Also, any START_UP program that may be part of the project has NOT been
executed.
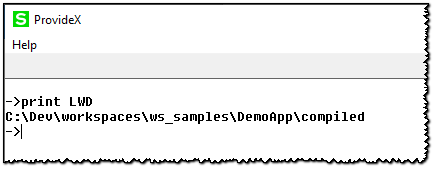
Type "PRINT LWD" into the ProvideX console to view the current working directory.
Since there is a START_UP program for this project, type RUN "START_UP" to execute the initialization steps as defined for
the DemoApp.
In the ProvideX console, type LOAD "menu" to load the lead
program for DemoApp.
In the ProvideX console, type RUN to run the Demonstration Application.