Prepare the Workbench
Before starting the tutorial, Eclipse must be properly set up for ProvideX
development. The following is assumed:
- You are starting with a new Eclipse installation using default settings.
- You are familiar with the basic Eclipse Workbench mechanisms, such as views and
perspectives.
If you are not familiar with the basic Workbench mechanisms, please review the Getting
Started chapter of the
Eclipse Workbench User Guide.
ProvideX Plug-in
Configuration
-
If you still see the Eclipse Welcome page, click the arrow icon to begin using
the Eclipse workbench.
-
Select the menu item
 Window > Preferences...
to open the workbench preferences.
Window > Preferences...
to open the workbench preferences.
-
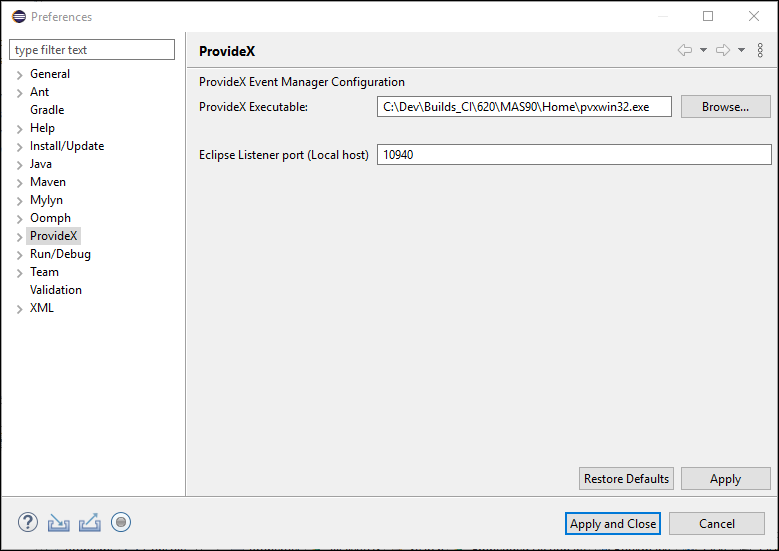
The ProvideX plug-in for Eclipse requires a local copy of ProvideX; ProvideX
programs are the engine behind the plug-in.
Select the
ProvideX
preference page.
- Set the path to the ProvideX executable by clicking the Browse... button and
specify the ProvideX executable to use.
- Set the port to be used for the Listener port.
The ProvideX
plug-in for Eclipse uses a NTHOST-like connection to a process where a listener
program is started. This allows for improved performance since there is no wait for
the environment to be initialized. The listener application waits for Eclipse to
send information about the next event to be processed. The listener will then start
the execution of a helper application that will perform the requested task.
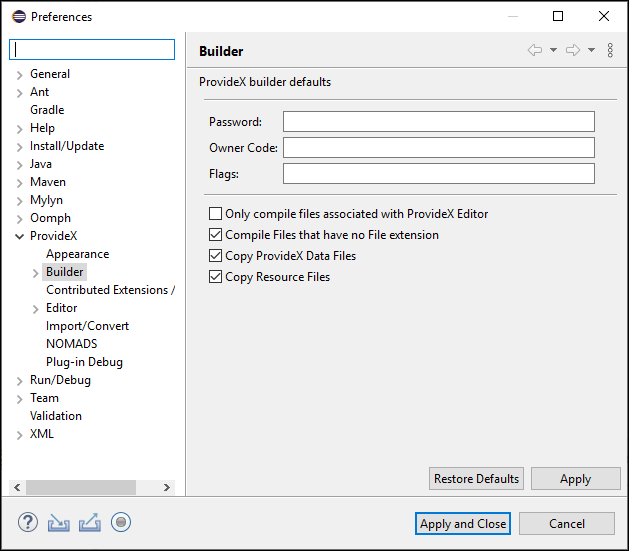
Select the
ProvideX > Builder
preference page and review / adjust the preferences to the appropriate values for
your environment.
Be sure to enable the options:
- Compile Files that have no extension, if you have any source files without file extensions
- Copy ProvideX Data Files
- Copy Resource Files
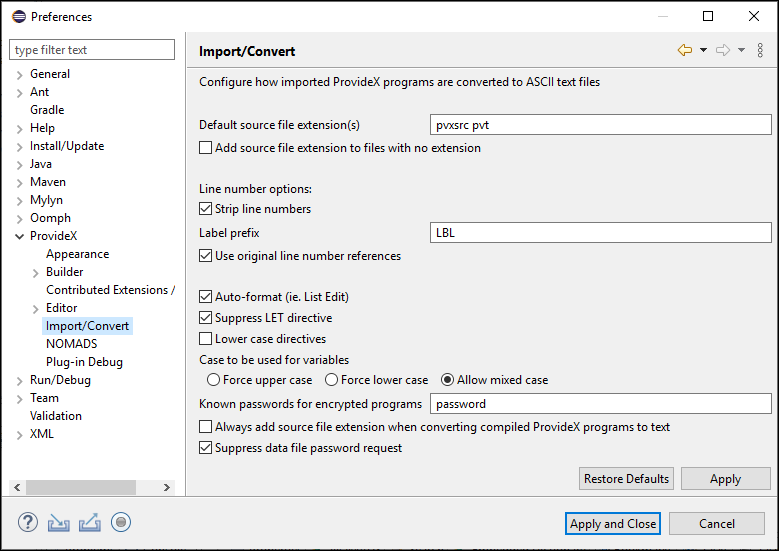
- Select the
ProvideX >
Import/Convert
preference page and review / adjust the preferences to the appropriate values for your
environment. Be sure to enable the preference Automatically convert
ProvideX programs to text so ProvideX programs will be converted to text during the
import step below.
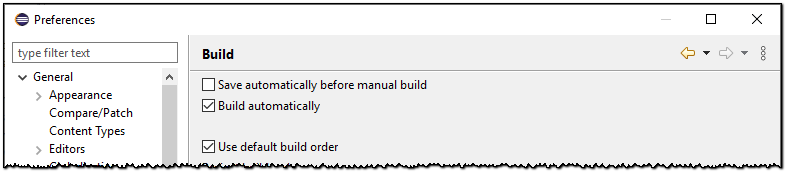
- Select the
General > Workspace
> Build
preference page. Confirm that the Build automatically option
is checked.
- Select the
General > Editors >
File Associations
preference page. Confirm that the file types *.pvc, *.pvs,
*.pvt, and
*.pvw
are associated with the ProvideX Editor. These file extensions should be preset; if
there are other file extensions that are used for ProvideX programs, they can be added
now.
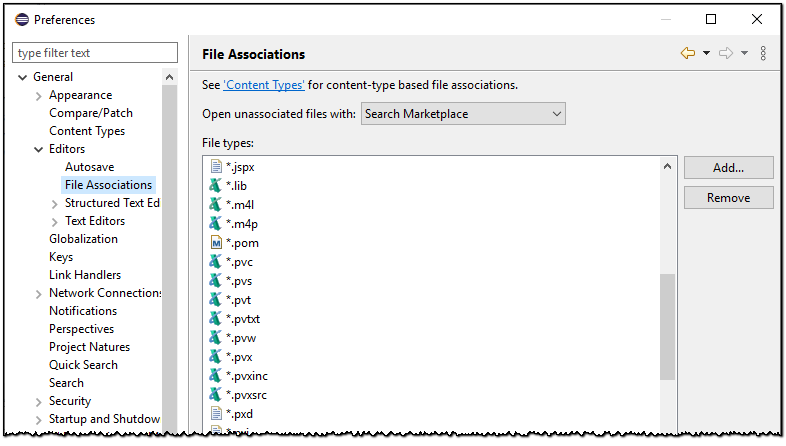
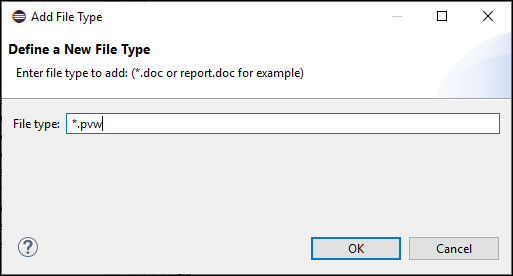
- To associate a file type with an editor press the File Types, Add... button.
The New
File Type dialogue will appear - enter the file extension in the File
Type field then
click OK.
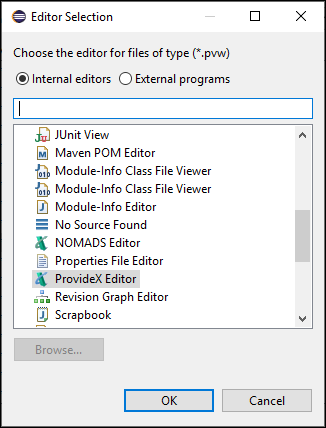
- Press the Associated Editors, Add...
button. The Editor
Selection dialogue will appear - scroll down and select the ProvideX Editor from the
list then click OK.
- Click OK
to save the preferences.