Launching a Program in WindX
In this section, you will run learn how to run ProvideX programs from the Workbench in
the WindX thin client. Prior to running the DemoApp, please do a clean build and make
sure there are no errors. For more information on building the project see Getting Started > Project Tutorial > Building
ProvideX Projects > Build the DemoApp Project.
-
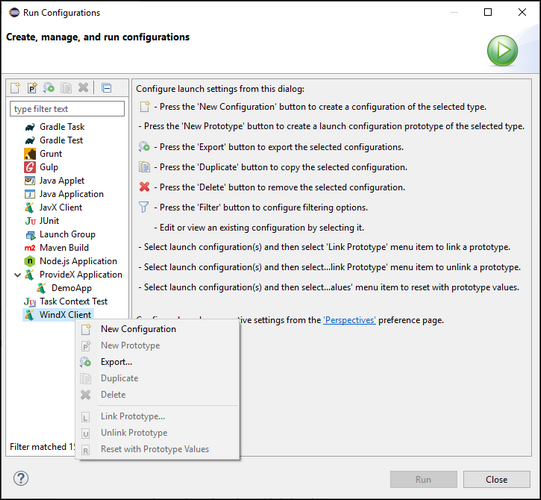
From the Workbench toolbar select Run > Run Configurations...
-
The Run Configurations dialog open. This allows you to configure how a program
is launched, including its arguments and other options.
-
Right click the WindX Client from the list of launch configurations and select
New Configuration.
-
The WindX Client launch configuration dialogue will appear. The WindX Client
launch configuration dialogue has four tabs:
- Application
- Arguments
- Client
- Common
Note: Three of the four WindX Client tabs are taken from the ProvideX
Application launch configuration.
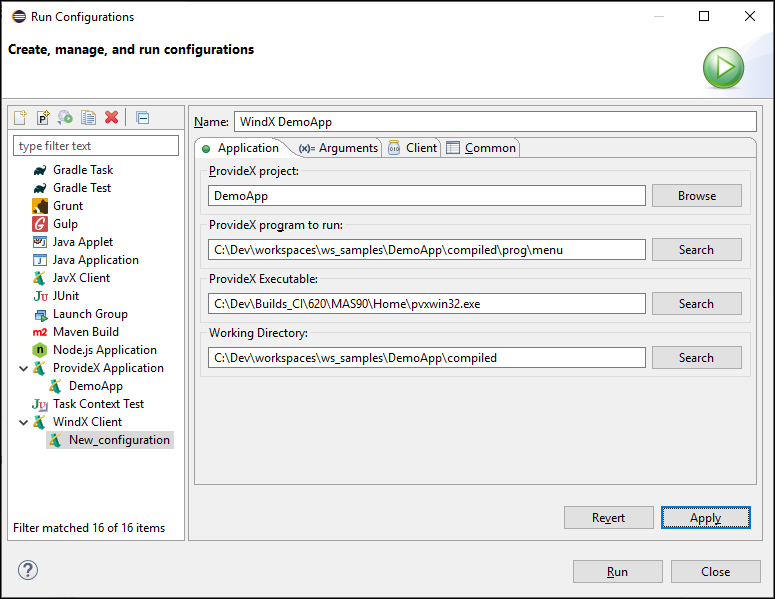
The Application Tab
The Following fields reside on the Application tab (below the Name field):
ProvideX project, ProvideX program to run, ProvideX Executable, and Working
Directory.
-
Enter "WindX DemoApp" in the Name field.
-
In the ProvideX project section, click the Browse button and
select the DemoApp project.
-
In the ProvideX program to run section click on the Search
button. Browse to and select the menu program in the project's output directory;
e.g., browse to the file: DemoApp\compiled\prog\menu
Note: Do not select the menu file in the input directory.
-
In the ProvideX Executable section, accept the default ProvideX executable
which will be the same one that was selected during the configuration of the ProvideX
plug-in.
-
In the Working Directory section, the default value will be the root
directory for the workspace; simply add the name of the project output directory (DemoApp\compiled) to the end of the default value
-
When the Application tab is done, click Apply.
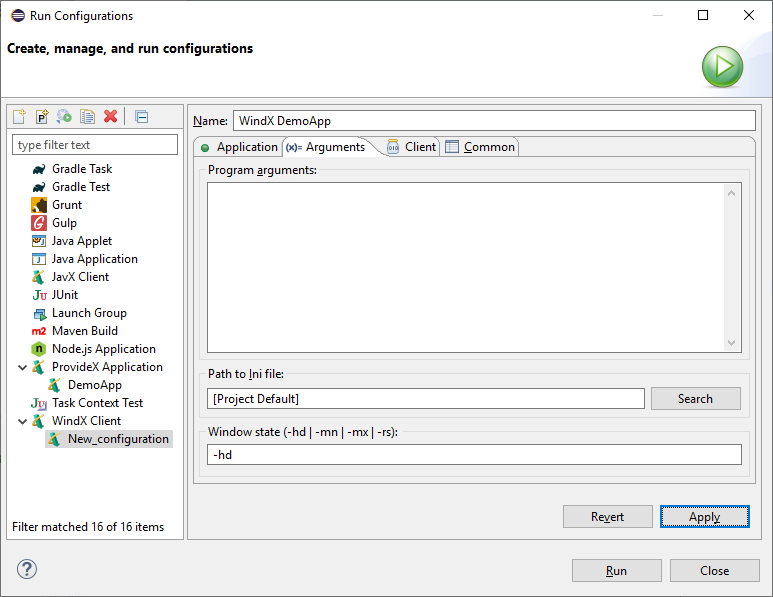
The Arguments Tab
The following fields reside on the Arguments tab: Program
Arguments, Path to Ini file, and Window state.
-
Select the Arguments tab.
-
By default, the program will use the project's default ini file. The project's default
ini file is found in the project's root directory. For more information on the default
ini file see Project Tutorial >
Creating a ProvideX Project. To specify an ini file use the Search
button, browse to, and select a ProvideX ini file located in any directory. This
application will run with the default ProvideX ini file so leave this field blank.
-
Enter "-hd" in the Window state field so the main window of
ProvideX session is hidden when the the menu program is run.
-
The Arguments tab is done, click Apply.
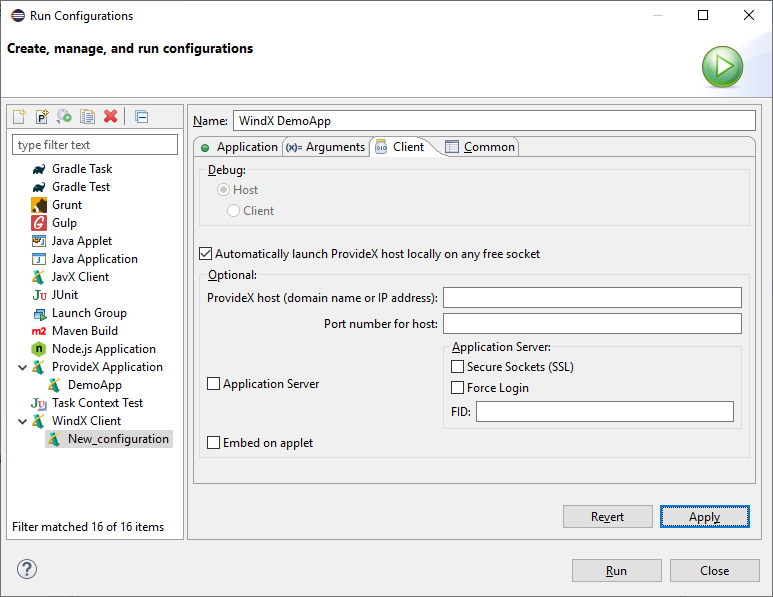
The Client Tab
The following fields reside on the Client tab: ProvideX host and Port
number for host.
-
Select the Client tab.
-
Simply check box beside the option Automatically launch
ProvideX host locally on any free socket.
-
The Client tab is done, click Apply.
-
Click the Run button on the Eclipse WindX launch configuration
dialogue.

-
Exit the ProvideX menu program.
-
Examine the Eclipse Console view. Messages regarding the life cycle of the
ProvideX program will be printed to the Console view.

-
To re-run this program, press Ctrl+F11 or press the run icon  on the Workbench
toolbar.
on the Workbench
toolbar.